
Belt replacement time
Manual recommendation: replace the belt every 10,000 km
Piaggio Piaggio part number: 832738
Slider Replacement
The manual calls for replacing the pulleys with drive belts. However, most owners find this is very conservative and the pulleys can last for multiple belt changes. It is recommended that the slider be replaced every three belt changes.
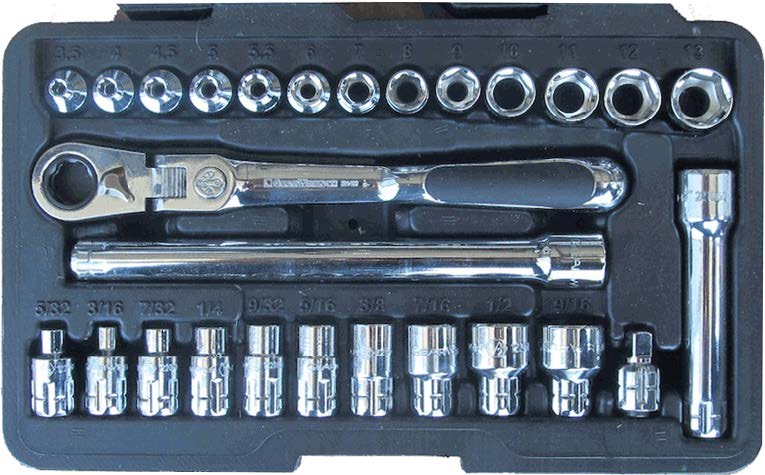
Tools
Small socket wrench set
Socket wrenches: 27 mm, 10 mm
21 x 23mm plum double-open wrench
Transmission clamping tool
Torque wrench (torque 200Nm)
Wooden hammer
Phillips screwdriver
Belt replacement sequence
- Park the scooter
- Remove the air filter
- Remove the gearbox cover
- Remove the gearbox
- Remove the driven pulley nut
- Remove the gearbox housing
- Remove the transmission and clutch
- Check transmission and weight
- Seat belt on the clutch
- connect transmission and clutch
- Torque the transmission nut
- Putting on the transmission cover
- 10.1 Bolts on the housing
- 10.2 Torque drive pulley nut
- Attaching the gearbox cover
- Installing the air filter
Park the vehicle safely
Place the motorcycle on the center stand and turn off the vehicle to disconnect the power.

Remove the air filter
Using a Phillips screwdriver, remove the nine air filter screws. Use a Phillips wrench to push the screws out of the air filter cover and put them in a box. Clean the air filter element by the way.
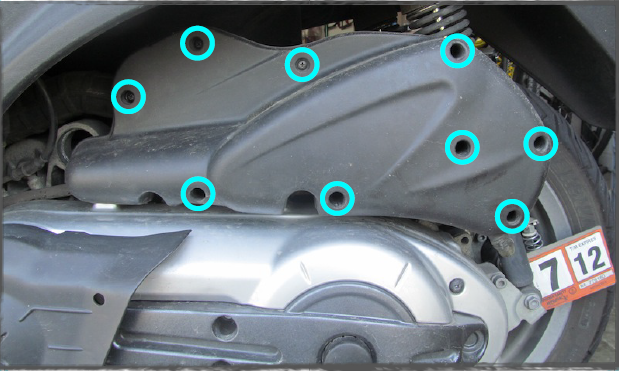
Remove the transmission cover
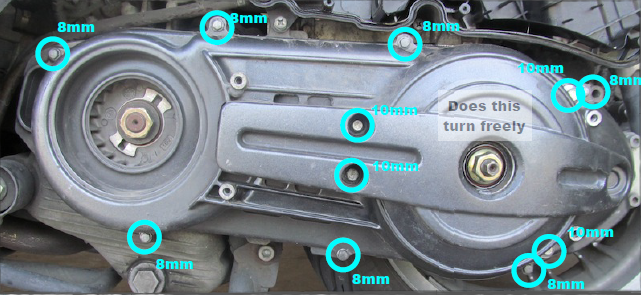
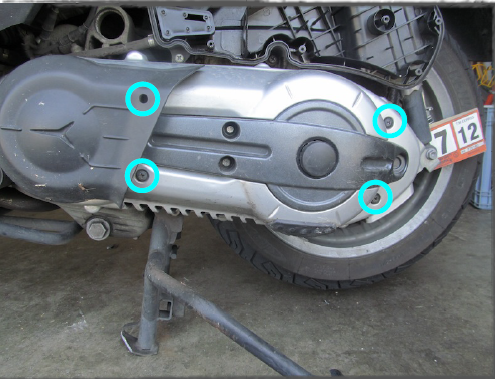
Using a Phillips screwdriver, remove the four transmission cover screws and place them in a box.

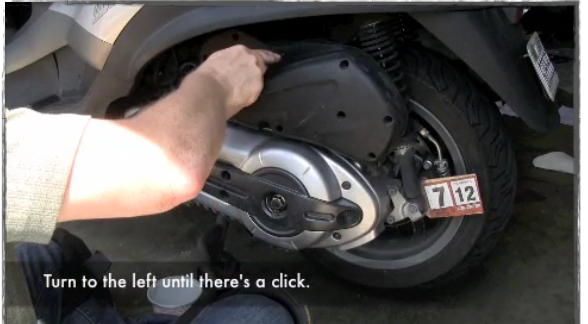
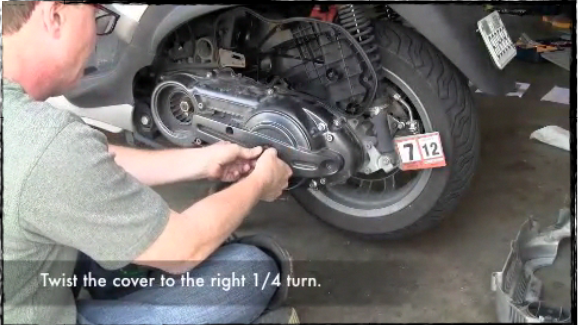
Remove the driven pulley cover
Remove the pulley cover by turning it a quarter turn to the right. Then remove the cover with a small one-piece screwdriver
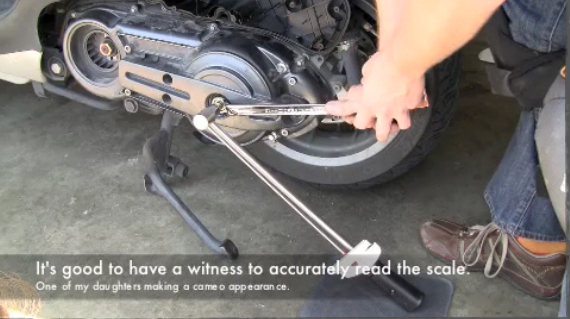
Remove the driven pulley nut
Make sure the parking brake is off. Place a 21 mm wrench on the nut at the 3 o'clock position. Place the shaft with the 10 mm wrench in the 7 o'clock position and place it on the ground. Pull on the 21 mm wrench with force. Slide the nut and washer onto the screwdriver so that it stays in place.

Removing the transmission case
Remove the seven 8 mm bolts and four 10 mm bolts using the extended small ratchet tool. After removing the housing, verify that the bearings in the shaft housing are free to rotate.

Remove the transmission and clutch
Attach the transmission clamping tool - use a 5mm allen wrench to tighten the spacer. Pull up the brake lever using a torque wrench and a 27mm socket. Slide the nut, washer, outer retaining plate, and large bushing onto the screwdriver to keep them in the correct order! After that remove the clutch cover, clutch, and belt.

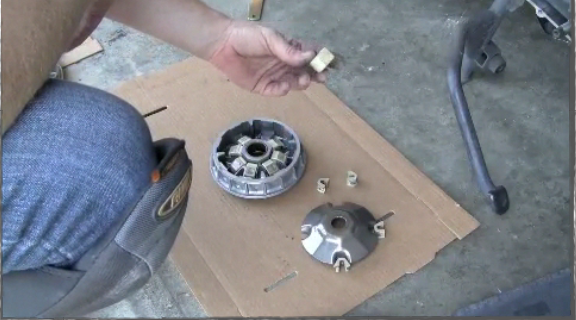
Check the transmission
Remove the transmission and clean it. Also, check it for wear and tear.
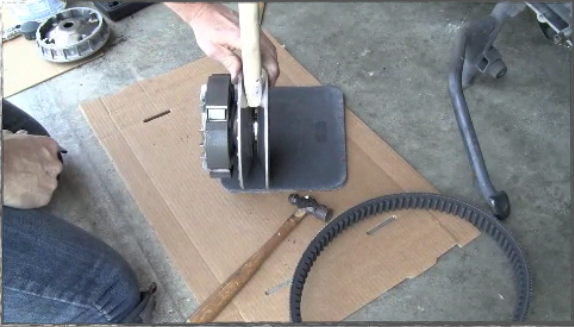
Install the drive belt on the pulley
Place the clutch side on a soft surface and position the "1" locating pin between the two pulley halves. Use a hammer to crack the locating pin between the two pulley halves to separate them. Place the belt between the two pulley halves and make sure the belt arrow points to the left when rotating counterclockwise.
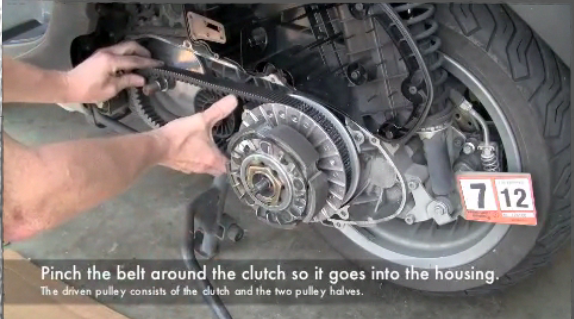
Connect the transmission and clutch
Install the transmission by clamping the belt around the pulley and installing it in the transmission housing. Next assemble the rest of the transmission, being careful not to pinch the drive belt between the two halves of the transmission.
Torque the transmission nut
Tighten the transmission nut to 160-175Nm. Finally, install the clutch cover and gasket and apply a little grease to the outside shaft.
Connecting the transmission housing
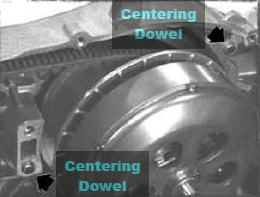
Slide the washer onto the shaft, making sure the locating pins are aligned. Use a ratchet to put it on again following the removal procedure.
8 mm nut torque: 23-27Nm
Torque 10mm nut: 11-13Nm
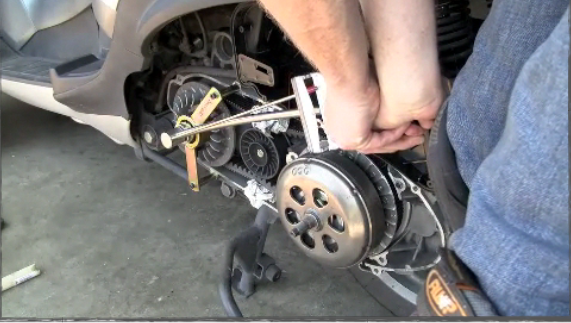
Torque Pulley Nuts
Make sure the parking brake is off. Place the 21mm wrench on the nut at the 2 o'clock position and the torque wrench with the 10mm socket on the shaft at the 5 o'clock position and place it on the ground. Put something soft underneath to protect its handle.
Nut torque: 92-100Nm
Put on the transmission housing
Put on the air filter